
Infection Control Renovation Guide for Clinics
Use this infection control renovation guide to plan compliant clinic upgrades, protect patient flow, control downtime, and support safer care delivery.
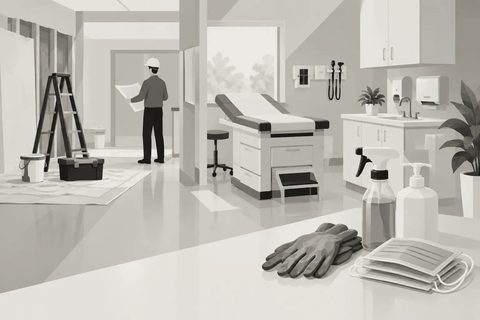
A renovation can introduce dust, mold spores, noise, odors, and access disruptions into a space where patients may be immunocompromised, in pain, or receiving time-sensitive care. This infection control renovation guide helps clinic owners treat construction as an operational and clinical risk management project, not just a finish upgrade. The objective is to protect patients and staff while keeping the practice open, productive, and positioned for a clean handover.
Start With a Clinical Risk Assessment
The first decision is not the flooring, paint color, or millwork package. It is defining what work will occur, who could be exposed, and how construction activity intersects with patient care. A small cosmetic refresh in an administrative area carries a different risk profile than removing ceilings beside treatment rooms, renovating a pharmacy dispensary, or expanding an imaging suite.
Before design is finalized, identify the patient population, clinical services, adjacent occupied spaces, HVAC zones, construction methods, and expected duration of each phase. This is the basis for an infection control risk assessment, often referred to as an ICRA. The assessment should align with the requirements of the facility, local authority having jurisdiction, applicable building and health regulations, and the standards your organization follows.
For an outpatient clinic, the practical questions are straightforward. Will demolition create dust near patient corridors? Does work require ceiling access that could disturb debris above exam rooms? Can workers reach the project area without passing through reception? Will a temporary shutdown affect sterilization, medication storage, handwashing, or the ability to clean rooms between appointments?
A good assessment produces a written plan with named responsibilities. It identifies required barriers, air-control measures, cleaning frequency, work hours, temporary routes, inspection points, and the conditions that must be met before a phase is released back to clinical use. Without that plan, containment decisions tend to be made after the first disruption has already reached the clinic.
Build Infection Control Into the Renovation Plan
Infection control is most effective when it is coordinated before permits, procurement, and scheduling are locked. Late changes can add cost, extend downtime, and force the practice into temporary workflows that frustrate staff and patients.
Separate construction traffic from patient traffic
Construction crews, deliveries, demolition waste, and patients should not share the same routes unless there is no viable alternative. Where a separate entrance is available, use it. Where it is not, establish delivery windows outside patient hours and map a controlled path from entry to the work zone.
This affects more than safety. It protects the patient experience. A patient arriving for infusion, dental treatment, or urgent care should not have to navigate carts, exposed materials, or a dusty corridor. Clear signage, protected travel paths, and predictable work hours reduce confusion at the front desk and keep appointments moving.
Contain the work zone before demolition begins
Temporary barriers should be selected for the scope of work. For low-impact projects, carefully sealed plastic containment may be acceptable where permitted and properly maintained. For projects involving demolition, prolonged work, or sensitive patient populations, rigid, sealed barriers provide greater durability and better control.
Barriers must extend to the structure where required, with penetrations sealed and access points controlled. They should be inspected daily, particularly after material deliveries, ceiling work, or trades moving equipment in and out. A barrier that looks complete but has open seams, unsealed gaps, or a poorly managed door is not a containment strategy.
The work zone also needs a defined transition area. This is where crews can remove disposable shoe covers or protective garments if used, wipe down equipment, and avoid tracking dust into public or clinical areas. The details depend on the project, but the principle is consistent: contamination should be managed at the edge of the construction zone, not after it travels through the clinic.
Control dust and air pressure
Dust control is the most visible part of many infection control plans, but air management is where projects succeed or fail. Activities such as cutting drywall, opening ceilings, drilling concrete, removing flooring, and disturbing wall cavities can spread particulate matter beyond the immediate work area.
For higher-risk work, negative air pressure within the construction zone helps direct air inward rather than allowing it to escape into occupied areas. HEPA-filtered air scrubbers may be required based on the risk assessment and project conditions. Pressure relationships should be verified and monitored, not assumed. If a temporary barrier door is opened repeatedly or HVAC systems are reconfigured, conditions can change quickly.
Existing HVAC equipment requires special attention. Do not assume a return grille inside the work area can remain active during demolition. Depending on the system and scope, ducts may need to be isolated, protected, cleaned, or recommissioned before the area returns to service. Coordinate HVAC shutdowns with clinical schedules so that temperature, ventilation, and room-function requirements remain appropriate in occupied areas.
Plan Phasing Around Clinic Operations
A renovation schedule that works on paper can still be costly if it blocks rooms during peak demand, interrupts check-in, or forces providers to work around incomplete support spaces. Infection control planning and operational phasing need to be developed together.
Many occupied clinics benefit from a phased sequence that renovates one zone at a time, maintains a stable patient route, and keeps clinical services separated from construction. The best approach depends on the practice. A dental office may need a temporary sterilization plan before treatment rooms are taken offline. A pharmacy may need controlled access and continuity for dispensing. A family medicine clinic may prioritize preserving exam room capacity and specimen-handling functions.
Night and weekend work can reduce patient exposure, but it is not automatically the best answer. Off-hours work can increase labor costs, limit supervision, and create rushed turnover if cleanup and verification are not properly scheduled. The right choice depends on patient volume, sensitivity of services, local noise restrictions, and the duration of the disruptive work.
Set clear stop-work triggers. For example, a damaged containment barrier, loss of negative pressure, water intrusion, or unexpected mold-like material should trigger immediate review before work continues. Staff need to know who to call and who has authority to pause a phase. This prevents operational teams from being left to resolve a construction issue while managing a waiting room.
Select Finishes That Support Cleaning and Durability
Infection control does not end when the contractor removes the barriers. The finished clinic must support daily cleaning, routine maintenance, and clinical workflow for years after opening.
Choose materials based on where they will be used and how they will be cleaned. High-touch surfaces need to tolerate the disinfectants used by your practice. Flooring should be durable, cleanable, and detailed to avoid unnecessary gaps or difficult transitions. In clinical areas, wall protection, solid-surface details, and durable corner conditions can reduce damage that later becomes hard to clean.
Avoid specifying finishes only from a showroom sample. A material may look appropriate but fail under repeated cleaning, carts, wheelchairs, rolling stools, or chemical exposure. Ask for product data, cleaning guidance, warranty conditions, and realistic maintenance expectations before approval.
Casework and room layouts matter as much as surface selection. Deep open shelves, inaccessible gaps behind equipment, and poorly located sinks create recurring cleaning burdens. A well-planned clinical room gives staff clear space for hand hygiene, supplies, waste handling, and turnover without forcing unnecessary movement around the patient.
Manage Water, Moisture, and Existing Conditions
Water events can turn a controlled renovation into a major operational problem. Protect existing finishes and equipment, inspect plumbing before demolition, and plan for shutoffs that do not compromise active clinical areas. If water intrusion occurs, address it immediately. Waiting until the end of the day can allow moisture to migrate into wall cavities, flooring assemblies, or stored materials.
Older buildings may also reveal conditions that were not visible during initial walkthroughs, including damaged substrate, suspect microbial growth, abandoned piping, or deteriorated insulation. The project team should define how these discoveries will be documented, evaluated, priced, and scheduled. A contingency is not poor planning. It is a practical acknowledgement that healthcare renovations often uncover hidden conditions.
Verify, Clean, and Reopen Deliberately
The final week of a project should not be treated as a race to move furniture back in. Before reopening a renovated area, verify that containment has been removed safely, debris is gone, surfaces have been cleaned, HVAC components are operating as intended, and required inspections are complete.
The turnover process should include a walkthrough with clinic leadership and the contractor. Confirm that handwashing fixtures work, clinical sinks are accessible, doors and hardware function properly, finish defects are addressed, and cleaning teams understand the care requirements for new materials. If the scope affected HVAC or plumbing systems, ensure relevant testing, balancing, commissioning, or documentation has been completed for the project.
Staff orientation is part of closeout. New room layouts, supply locations, waste routes, and cleaning procedures can change how a team works. A short operational review before the first patient arrives can prevent the small problems that otherwise surface during a busy clinic day.
Make Infection Control a Business Decision, Too
The cost of a strong infection control plan is visible in the project budget. The cost of a weak one often appears later as canceled appointments, complaints, staff disruption, remediation, extended downtime, or damage to the practice’s reputation. The goal is not to overbuild temporary measures for every project. It is to match controls to the real clinical and construction risks.
For clinic owners, the most profitable renovation is not simply the lowest bid or the fastest demolition schedule. It is the one that protects patient care, preserves revenue-producing capacity, meets applicable requirements, and produces a facility that is easier to operate after the contractor leaves. Medical Contractor approaches these decisions by connecting construction sequencing, clinical workflow, regulatory planning, and practice economics from the start.
Before authorizing demolition, require a clear risk assessment, a phased operating plan, and a reopening checklist. Those three documents give your team a practical standard for protecting the patients who trust your clinic while the space changes around them.
Talk it through with Justin on a 30-minute call.